


Table of Contents
- Gathering Your Best Gift Wrapping Supplies
- How to Wrap Gifts Professionally: Measuring and Cutting
- Mastering Core Gift Wrapping Techniques
- Gift Wrapping for Irregular Shapes and Odd Items
- How to Make a Gift Bow and Add Finishing Embellishments
- Troubleshooting Common Gift Wrapping Mistakes
- Sustainable and Eco-Friendly Wrapping Options
- Conclusion: Elevate Your Gift Presentation
Last Updated: July 27, 2026
Learning how to wrap gifts professionally at home is easier than you might think. The difference between amateur wrapping and professional-looking results comes down to technique, patience, and having the right supplies. Below, we'll show you exactly how to wrap gifts professionally at home using step-by-step methods that deliver polished, gift-shop-quality results.
Gathering Your Best Gift Wrapping Supplies
The foundation of professional gift wrapping starts with quality materials. Assemble everything you'll need in one dedicated space before you begin.
Essential Tools and Materials
Double-sided tape is non-negotiable, it keeps seams completely hidden, separating amateur wrapping from professional finishes. Standard tape leaves visible lines that undermine even perfect folds. You'll also need sharp scissors that cut cleanly without tearing or crushing the material. Dull blades create ragged edges that look sloppy.
Quality wrapping paper makes an immediate difference. Thicker paper with good texture holds creases better than thin alternatives. Keep several colors and patterns on hand, solid colors work for formal occasions, while patterned paper adds personality. Kraft paper has become increasingly popular for a sophisticated, minimalist look.
Ribbon and twine elevate your presentation significantly. Satin ribbon creates elegant bows, while twine adds rustic charm. Keep multiple widths available. Gift tags complete the package, and personalized tags add a thoughtful touch.
Setting Up Your Gift Wrapping Station
A dedicated wrapping station transforms the process from chaotic to efficient. Find a large, flat surface, a dining table works perfectly, where you can lay out paper, measure, and work without interruption. Good lighting is essential; natural daylight or a bright overhead lamp helps you see creases and alignment clearly.
Organize your supplies within arm's reach. Keep scissors, tape, and ribbon in the center of your workspace. Stack boxes of paper to one side and finished supplies to the other. Temperature and humidity matter more than most people realize. Cold environments make paper brittle and prone to cracking. Warm, slightly humid conditions keep paper pliable and cooperative.
How to Wrap Gifts Professionally: Measuring and Cutting
Accurate measurement determines whether your wrapped gift looks balanced or haphazard.
Calculating the Right Amount of Paper
You need enough paper to wrap around the box once with a 2-3 inch overlap for the seam, plus enough to cover the top and bottom with minimal excess.
Place your gift box on the paper lengthwise. Roll the paper around the box and mark where the paper meets itself, that overlap should be 2-3 inches, never more. Excess paper creates bulky, unprofessional-looking seams. For the width, the paper should cover from the center of one end to the center of the other end with just enough to fold down neatly.
Practice this measurement technique a few times before cutting. Most wrappers develop an intuitive sense for the right amount after wrapping 5-10 gifts. If you're uncertain, cut slightly larger; excess can be trimmed, but too-small paper cannot be extended.
Cutting Paper to Size with Clean Edges
Sharp scissors make the difference between clean, straight cuts and torn, jagged edges. Hold the paper flat against your work surface and cut in one smooth motion rather than multiple short cuts.
For a truly professional look, use a paper cutter or craft knife with a metal ruler. These tools produce perfectly straight edges that scissors alone cannot match. After cutting, inspect the edges and trim away any tears or rough spots. Even a small ragged edge becomes obvious once the gift is wrapped.
Mastering Core Gift Wrapping Techniques
These fundamental techniques are what professional gift wrappers rely on consistently.
Folding Sides and Creating a Clean Seam
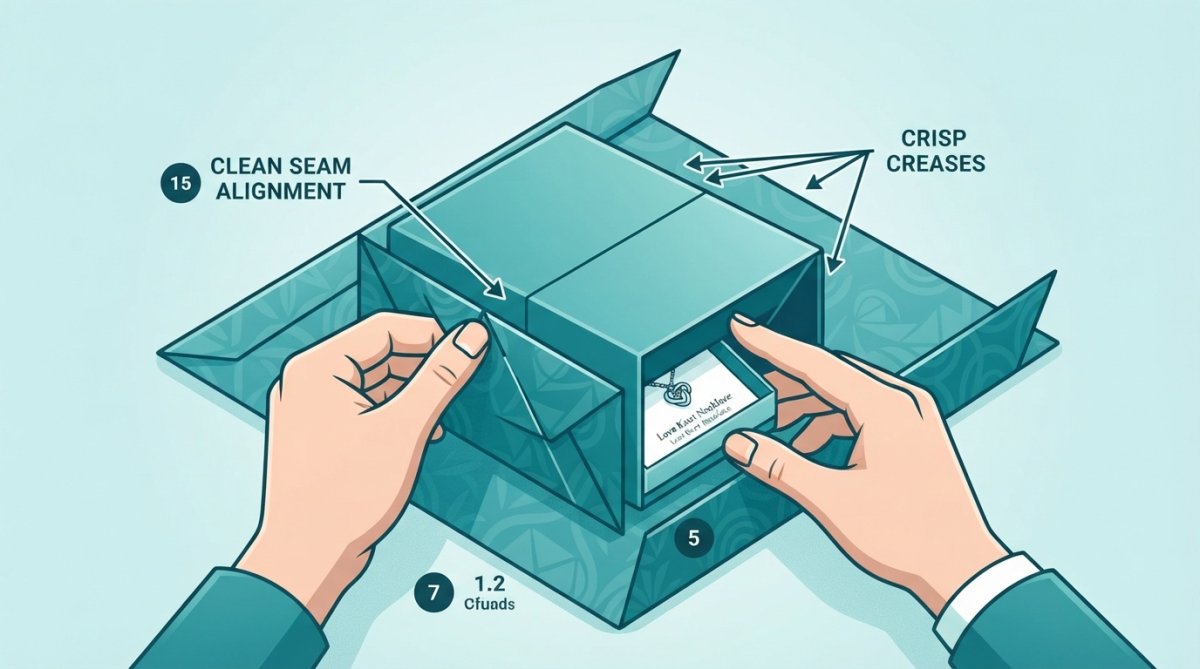
The seam is where amateur and professional wrapping diverge most noticeably. A clean seam runs straight down the center of one side of the box with no visible tape and perfectly aligned edges.
Place your gift box in the center of your cut paper. Fold one long edge of the paper up and over the box, creasing sharply along the edge. This crease is crucial, press it firmly with your finger to establish a clean line. Fold the opposite edge over the top, overlapping by 2-3 inches. Before securing anything with tape, ensure both edges are perfectly aligned. Any waviness or misalignment will be visible in the final product.
Securing with Double-Sided Tape for a Seamless Look
Double-sided tape creates an invisible seam because there's no visible line of adhesive. Cut small pieces of double-sided tape, about 2-3 inches long, and position them along the underside of the top paper edge. Press firmly for 2-3 seconds to ensure strong adhesion. Run tape along the entire length of the seam for maximum strength.
Achieving Crisp Corners and Professional Creases
The corners are where your wrapping either looks sharp or sloppy. Fold the paper down at the top of the box to create a sharp crease aligned with the corner. Fold the two side flaps up and inward, creating a triangular fold at each corner. These triangular folds should meet exactly at the center point of the box end.
Crease all folds sharply before securing. Use your fingernail or a bone folder to press creases firmly. Weak creases look soft and unprofessional. Fold the bottom flap up and secure it with double-sided tape. The result should be a perfectly wrapped end with no visible raw edges or gaps.
Gift Wrapping for Irregular Shapes and Odd Items
Not every gift comes in a neat rectangular box.
Wrapping Bottles, Cylinders, and Tubes
Measure your paper so it wraps around the bottle with a 2-3 inch overlap. Cut a rectangle of paper tall enough to cover the bottle with 1-2 inches of overlap at the top and bottom. Wrap the paper around the bottle, securing the seam with double-sided tape down the center of one side.
For the ends, cut two circles of paper slightly larger than the bottle's diameter. Fold the edges of these circles inward, creating a gathered effect at the top and bottom. Alternatively, use tissue paper to create a gathered effect at the top and bottom, then secure with ribbon. This approach is faster and often looks more elegant.
Handling Unusually Shaped Packages
For soft, plush items, consider using a gift bag instead of wrapping paper. This is a professional choice when the item's shape makes traditional wrapping impractical. Add tissue paper and a bow to make it look intentional and elegant.
For hard, irregular shapes, use the "bundle wrap" technique. Wrap the item in a large piece of paper, gather the paper at the top like a candy wrapper, and secure with ribbon. Alternatively, break the item into sections conceptually and wrap each section separately with coordinating paper.
How to Make a Gift Bow and Add Finishing Embellishments
The bow transforms a wrapped gift from complete to polished.
Creating a Perfect Ribbon Bow from Scratch
Start with a length of ribbon, about 24-36 inches depending on how full you want the bow. Create a loop on one side by folding the ribbon back on itself. Create a second loop on the opposite side. Continue creating loops, alternating sides, until you have 4-6 loops total.
Pinch all loops together at the center point. Cut a short piece of ribbon and wrap it tightly around the center, securing all loops. Fluff the loops outward, adjusting them to create a full, balanced appearance. Trim the tail ends at an angle for a professional finish.
Alternatively, use pre-made bows for speed and consistency. Quality silk or satin bows look professional and save time when wrapping multiple gifts.
Budget-Friendly DIY Embellishments and Alternatives
Twine is an incredibly versatile and inexpensive embellishment. Wrap twine around the gift in a cross pattern, tying it off with a simple knot or bow. This creates a rustic, sophisticated look that works with any wrapping paper color.
Dried flowers, sprigs of greenery, or fresh pine clippings add natural elegance. Tuck these into your bow or secure them to the gift with twine. Personalized gift tags elevate the presentation significantly. Hand-write the recipient's name on quality cardstock, punch a hole, and attach with twine or ribbon.
Washi tape, decorative Japanese tape available at craft stores for under $2, can accent edges, create patterns, or secure paper seams. Stamps and ink allow you to add personalized patterns or messages directly to kraft paper.
Troubleshooting Common Gift Wrapping Mistakes
Even experienced wrappers encounter problems.
Fixing Torn Paper and Wrinkles
A tear in visible wrapping paper doesn't mean starting over. Small tears can be concealed with ribbon, a bow, or a decorative element positioned strategically. Cut a piece of matching paper slightly larger than the tear, apply double-sided tape to its back, and layer it over the tear.
Wrinkles in paper usually result from humidity or improper storage. If your paper is wrinkled before wrapping, lay it flat under a heavy book for an hour or two. Keep paper stored flat rather than rolled.
Avoiding Uneven Folds and Loose Seams
Uneven folds result from rushed work or insufficient creasing. Always crease each fold sharply before moving forward. Use your fingernail, a bone folder, or even a credit card edge to press creases firmly.
Loose seams occur when tape isn't pressed firmly enough or when the paper overlap is too small. Press tape for 3-5 seconds to ensure strong adhesion. Before securing anything with tape, step back and verify that your paper edges are straight and properly aligned.
Sustainable and Eco-Friendly Wrapping Options
Professional wrapping doesn't require disposable paper that ends up in landfills.
Fabric wrapping, known as furoshiki in Japanese tradition, uses cloth to wrap gifts. A beautiful scarf, tea towel, or piece of fabric serves as both wrapping and a bonus gift the recipient can reuse. Wrap the gift by tying the fabric corners together.
Kraft paper made from recycled materials provides a natural, earthy aesthetic. Pair kraft paper with twine and dried botanicals for a completely sustainable presentation. Newspaper, brown paper bags, and comics create artistic, unique wrapping that shows creativity and environmental awareness.
Seed paper, paper embedded with flower or herb seeds, allows recipients to plant the wrapping after unwrapping. Reusable gift bags made from durable fabric or cardboard can be used year after year. Invest in several quality bags in neutral colors and use them repeatedly.
Conclusion: Elevate Your Gift Presentation
The difference between an ordinary wrapped gift and one that looks professionally finished comes down to technique, quality supplies, and attention to detail. These aren't complicated skills, they're habits that develop through practice. When you invest time in mastering these methods, every gift you present reflects care and thoughtfulness that recipients notice and appreciate.
Whether you're wrapping gifts for family, clients, or special occasions, Elvora Gifts understands the importance of presentation. Our gift wrap with personalized message service at just $7.95 adds a professional touch when you need it, and our curated selection of premium gifts deserves wrapping that matches their quality. Elvora Gifts offers free shipping on orders over $70, making it easy to send beautifully wrapped gifts nationwide. Transform your gift-giving with presentation that's as thoughtful as the gift itself.
According to The Craft and Hobby Association's 2026 consumer survey, 67% of gift recipients notice and appreciate quality wrapping, with professional-looking presentation significantly increasing perceived gift value. Etsy's 2026 trend report on sustainable gift wrapping highlights growing consumer preference for eco-friendly wrapping options, with searches for sustainable materials increasing 45% year-over-year. The American Gift Wrap Association's best practices guide confirms that proper measurement, sharp tools, and double-sided tape are foundational to achieving polished results that rival commercial gift-wrapping services.
Frequently Asked Questions
What supplies do I need to wrap gifts professionally at home?
Essential supplies include quality wrapping paper, sharp scissors, double-sided tape, and a ruler or measuring tape for precise cuts. You'll also want ribbon, bows, and gift tags for finishing touches. Consider setting up a dedicated gift wrapping station with these materials organized and easily accessible. Having cardstock or tissue paper on hand gives you options for different gift sizes and shapes.
How do I wrap odd-shaped gifts and irregular items professionally?
For odd-shaped items, use the diagonal wrapping technique: place the gift at a 45-degree angle on the paper and fold the paper around it like an envelope. For bottles and cylinders, wrap the paper around the item and fold the ends like a candy wrapper, then crimp the edges. For extremely irregular shapes, consider using gift bags or fabric wrapping as alternatives that still look polished and professional.
What's the best way to make a gift bow that looks professional?
Start with a ribbon length of about 2-3 feet. Create two loops of equal size, cross them to form an X, then pull the center tight. Adjust the loops for symmetry and fluff them out for fullness. Alternatively, use pre-made bows to save time. Budget-friendly DIY options include making bows from fabric scraps, newspaper, or kraft paper for a creative, eco-conscious touch that still looks intentional and refined.
How do I achieve crisp corners and clean edges when wrapping?
The key is precise measuring and sharp creasing. Measure your paper carefully so it wraps around the box with minimal overlap. Use your fingernail or a ruler edge to crease folds sharply before securing with tape. Fold the ends of the paper like an envelope, creating triangle flaps that you tuck neatly underneath. Double-sided tape keeps seams invisible, and taking your time with each fold ensures professional-looking, clean edges throughout.
This article was written using GrandRanker


